To plant button mushrooms at home, start by purchasing a mushroom kit and preparing a dark, moist environment. Follow the kit’s instructions for soil preparation and spore inoculation.
Growing button mushrooms at home can be a rewarding experience for gardening enthusiasts and food lovers alike. Button mushrooms, known scientifically as Agaricus bisporus, are one of the most popular varieties for home cultivation due to their delicious taste and relatively simple growing requirements.
With a ready-to-use mushroom kit, which includes spores and a growth medium, even beginners can embark on this fascinating journey. The process involves setting up the correct environment, which typically means a cool, dark, and damp space. Embracing this DIY project not only enhances your gardening skills but also provides a fresh, organic addition to your cooking. It’s a fun, educational activity that could turn into a delightful hobby with tasty rewards.
Introduction To Button Mushrooms
Button mushrooms spark interest among home gardeners worldwide. These fungi offer a delightful addition to any dish. Growing them at home can be simple and rewarding. With the right setup, even beginners can cultivate a healthy crop.
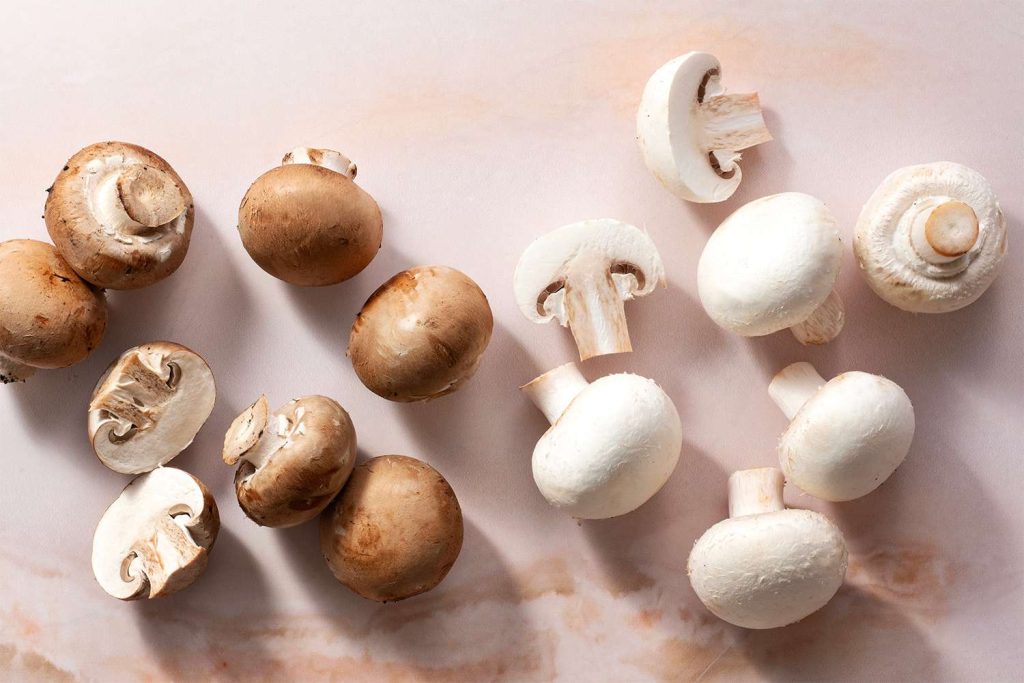
Popular Varieties
- White Button: Mild flavor, versatile in cooking
- Cremini: Brownish hue, richer taste
- Portobello: Mature Cremini, meaty texture
Health Benefits
Button mushrooms are nutrient-dense. They are low in calories and high in vitamins. These mushrooms support immune health. They also contain antioxidants, which help fight aging. Adding button mushrooms to your diet promotes overall wellness.
Essential Supplies For Mushroom Cultivation
Ready to grow button mushrooms at home? Start with the right supplies. Below are essentials for successful mushroom cultivation.
Growing Medium
Button mushrooms need a rich substrate. The growing medium is crucial.
- Compost: A blend of straw, manure, and gypsum.
- Peat moss: For the casing layer, aiding moisture retention.
Spores Or Spawn
Spores or spawn are like seeds for mushrooms.
Choose quality spawn for best results.
- Spore syringe: Contains spores in a nutrient solution.
- Spawn bags: Grain bags inoculated with mushroom mycelium.
Tools And Equipment
Proper tools make mushroom growing easy.
Ensure you have the following:
| Tool | Use |
|---|---|
| Spray bottle | Keeps humidity high |
| Thermometer | Checks growing conditions |
| Hygrometer | Monitors moisture levels |
| Gloves | Keeps process sterile |
Choosing The Right Location
Choosing the Right Location is crucial for growing button mushrooms. These fungi need specific conditions to thrive. Whether indoors or outdoors, understanding the environment will ensure a successful harvest.
Indoor Vs Outdoor
Planting mushrooms inside offers control over growing conditions. Space in basements or closets can turn into mushroom farms. Outside growing depends on climate and can be less predictable.
Temperature And Humidity Control
- Button mushrooms prefer cool temperatures, between 55-60°F.
- Humidity levels should stay around 90-95%.
- Use humidifiers or misters for indoor areas to maintain moisture.
- Outdoor setups need shading to protect mushrooms from direct sunlight.
Preparing The Substrate
Embarking on a mushroom-growing journey begins with one critical step: preparing the substrate. Button mushrooms thrive on a rich base, and getting this right sets the stage for a bountiful harvest. Let’s dive into the substrate preparation process.
Sterilization Process
Eliminating contaminants is vital for mushroom cultivation. Use the following steps to sterilize your substrate:
- Fill a large pot with your chosen substrate material.
- Cover the pot and heat it to 160-180°F (71-82°C).
- Keep at this temperature for at least 90 minutes.
- Allow the substrate to cool inside the pot.
Nutrient Enrichment
Button mushrooms need nutrient-rich substrates to grow. Follow these steps to enrich your substrate:
- Mix in organic materials like straw or manure.
- Ensure a consistent mixture for even growth.
- Balance the moisture content; it should feel damp, not wet.
With these steps, your substrate is ready to support a flourishing crop of button mushrooms. Next, you’ll learn how to inoculate and maintain the perfect environment for growth.
Spawning: Sowing Your Mushroom Seeds
Planting button mushrooms at home starts with spawning. This means sowing your mushroom seeds. Let’s dive into how to do it right.
Spawn Inoculation
First, you need the right spawn. Think of spawn as mushroom seeds. Buy them from a reliable source. This ensures your mushrooms grow healthy.
Next, prepare your growing medium. Use compost or a soil mixture. Make sure it’s moist. Not too wet, not too dry.
- Mix the spawn with the growing medium.
- Spread this mix in a tray. A shallow one works best.
- Cover the tray with a damp cloth. This keeps moisture in.
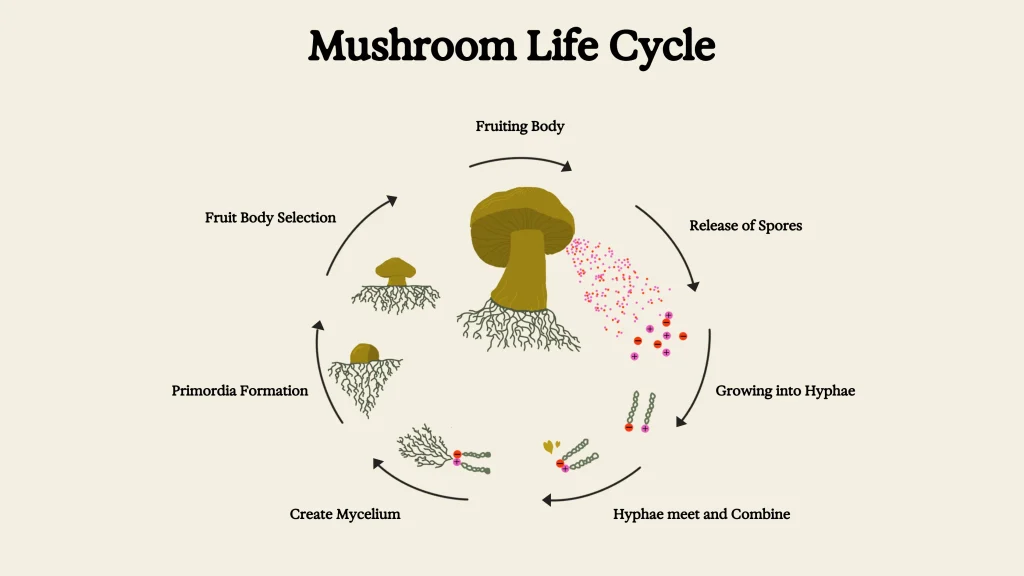
Incubation Period
Now, your mushrooms need to incubate. This means they need time to grow.
Place the tray in a dark, cool place. An ideal temperature is around 70°F (21°C).
| Day | Task |
|---|---|
| 1-3 | Check moisture. Keep it damp. |
| 4-10 | Watch for white threads. These are mycelium. |
| 11-14 | Mycelium covers the soil. It’s growing time! |
After two weeks, you’ll see white threads. These are mycelium. Mycelium is the mushroom plant. Now, your mushrooms are ready to grow!
Caring For Your Mushroom Crop
After planting your button mushrooms, caring for them is crucial. Proper care ensures healthy growth and a bountiful harvest. Let’s dive into the essential steps for nurturing your mushroom crop.
Watering Techniques
Mushrooms love moisture, but too much water can harm them. Follow these tips:
- Mist your mushrooms gently rather than watering heavily.
- Use a spray bottle to control the amount of water.
- Keep the soil consistently moist, not soaked.
- Water in the morning to allow surface moisture to evaporate by night.
Lighting Conditions
Mushrooms have unique lighting needs:
- They prefer low light conditions.
- Avoid direct sunlight; it can damage the mushrooms.
- Place them in an area with indirect light, like a shaded window.
- 12 hours of light and 12 hours of darkness is ideal for growth.
Contamination Prevention
Keeping your crop safe from contaminants is key:
- Use sterilized soil and equipment to avoid introducing harmful bacteria.
- Regularly check for signs of mold or unusual spots.
- Isolate infected mushrooms immediately to prevent spread.
- Wash hands before handling mushrooms or working in their growing area.
Harvesting Your Button Mushrooms
Discover the joy of plucking fresh button mushrooms from your home garden. Timing and technique are key to harvesting mushrooms. Learn when and how to harvest your crop for the best flavor and texture.
When To Harvest
Button mushrooms are ready when the cap separates from the stem. Look for a slight flattening of the cap. This is the peak time for picking. They should be firm and white. Avoid waiting too long. Overripe mushrooms lose their texture and taste.
Harvesting Methods
Harvesting mushrooms is simple and gentle. Twist the mushroom near the base. Pull it up without disturbing the mycelium. Use a sharp knife to cut the stem if needed. Pick mushrooms individually. This keeps the growing area undamaged for new mushrooms.
- Check mushrooms daily.
- Harvest in the morning for best results.
- Store in a cool place immediately after picking.
Post-harvest Handling And Storage
After harvesting your button mushrooms, proper post-harvest handling and storage are crucial. These steps ensure your mushrooms stay fresh and safe to eat. Let’s dive into the best practices for cleaning, packaging, and maximizing shelf life.
Cleaning And Packaging
Clean mushrooms with care. Brush off any dirt gently. Use a damp cloth if needed. Avoid soaking, as mushrooms absorb water.
Package mushrooms soon after cleaning. Use breathable materials, like paper bags, for packaging. This helps to prevent moisture buildup.
| Step | Materials | Action |
|---|---|---|
| 1 | Paper bag | Store mushrooms |
| 2 | Brush or cloth | Clean gently |
Shelf Life Maximization
To extend shelf life, keep mushrooms cool. Store them in a refrigerator at 2-4°C (35-39°F). Use within seven to ten days for best quality.
- Refrigerate promptly
- Store at 2-4°C (35-39°F)
- Consume within 7-10 days
Keep mushrooms in their original packaging. If opened, use a fresh paper bag. Seal bags loosely to allow air flow. This prevents spoilage.
Remember, cool temperatures and proper packaging are key. They help maintain freshness and flavor. Follow these tips to enjoy your homegrown button mushrooms longer.
Troubleshooting Common Issues
Growing button mushrooms at home can be rewarding. Yet, gardeners often face issues. Recognizing and solving these problems is key for a healthy crop.
Pest And Disease Management
Button mushrooms can attract pests and suffer from diseases. Common pests include fungus gnats and mites. Diseases like mold can also arise. Here’s how to manage them:
- Keep growing area clean: Sanitation reduces pest and disease risk.
- Use proper substrate: A good mix prevents many issues.
- Monitor humidity and temperature: Ideal conditions deter pests.
- Inspect regularly: Catching problems early is crucial.
Dealing With Poor Yield
A low mushroom yield can be disappointing. Many factors affect growth. Here are tips to boost your harvest:
- Ensure correct temperature: Button mushrooms need 18-24°C.
- Maintain moisture levels: Mushrooms require consistent moisture.
- Provide darkness: Initial growth thrives in the dark.
- Use high-quality spawn: Better spawn leads to better yield.
Remember to give your mushrooms time to develop. Patience often pays off with a bountiful harvest.
Enjoying Your Homegrown Mushrooms
Growing button mushrooms at home is rewarding. Once harvested, it’s time to enjoy them. From kitchen to table, these earthy delights transform meals. Let’s explore how to savor your homegrown mushrooms.
Recipe Ideas
Homemade mushrooms offer fresh flavors. Try these:
- Mushroom Soup: Creamy and comforting.
- Risotto: Rich with mushroom goodness.
- Omelets: Add a hearty touch to breakfast.
Nutritional Integration
Integrate mushrooms for a health boost.
| Meal | Idea |
|---|---|
| Salads | Add sliced mushrooms for texture. |
| Pasta | Mix in for a nutrient-rich dish. |
| Snacks | Create mushroom-based dips. |
Frequently Asked Questions
What Do You Need To Start Growing Button Mushrooms?
To start growing button mushrooms, you need mushroom spores or spawn, composted manure or a mushroom growing medium, a dark, cool, and humid environment, and patience. Begin by preparing your substrate and inoculating it with the spawn, then maintain proper conditions for growth.
How Long Does It Take To Grow Button Mushrooms?
Growing button mushrooms typically takes about 4 to 6 weeks from inoculation to harvest. The process involves preparing the growing medium, inoculating it with mushroom spawn, and maintaining optimal conditions for mushroom development through the pinning and fruiting stages.
Can Button Mushrooms Be Grown Indoors?
Yes, button mushrooms can be grown indoors successfully. They require a controlled environment with low light, high humidity, and temperatures between 55°F and 70°F (13°C to 21°C). An unused closet, basement, or garage can provide an ideal setting for growing button mushrooms at home.
What Is The Best Substrate For Button Mushrooms?
The best substrate for growing button mushrooms is composted manure, often mixed with straw. This substrate should be pasteurized to kill any unwanted bacteria or pests. Some growers also use a mixture of gypsum and wheat bran to enrich the substrate and promote healthy mushroom growth.
Conclusion
Growing button mushrooms at home is both rewarding and straightforward. With the right substrate, conditions, and a little patience, you’ll enjoy a bountiful harvest. Embrace the process and savor the taste of your home-grown delicacies. Start your mushroom-growing adventure today and join the ranks of successful indoor gardeners!